Saturday, February 7, 2015

sandbox solutions are deprecated in SharePoint 2013 ?

This blog will talk about why and what exactly is deprecated for sandbox solution in SharePoint 2013

Why
Sandbox solution had many disadvantages and if we see our SharePoint 2010 development we hardly looked sandbox solution as solution for most of our requirements
Few disadvantages of sandbox solutions:
  1. Limited access to object model
  2. Learning curve to understand the sandbox architecture
  3. Not easy to create proxy for full trusted code.

What
Many blogs says sandbox solution are deprecated yes its true but not completely
Sandbox solution containing only declarative things (like Web Templates and Design )
are still supported and not deprecated and sandbox solutions containing code is deprecated.
so if your solution doesn’t have code…consider the sandbox as solution.

Custom itemstyle.xsl for Content Query Webpart in SharePoint

While using Content Query Web Part its always best practice to use custom Item Style so here we will see how to create new templates in itemxsl style and change the reference in .webpart to custom item xsl style
1. Navigate to Style library –> XSL style sheets –> Itemstyle.xsl
And download the local copy .
2. ItemStyle.xsl contains different templates e.g. Default, NoImage, TitleOnly, TitleWithbackground etc,So to create custom ItemStyle.xsl , save ItemStyle.xsl as CustomItemStyle.xsl . Delete all the templates and add the new template with different name say HRDocs
<xsl:stylesheet
version=”1.0″
exclude-result-prefixes=”x d xsl msxsl cmswrt”
xmlns:x=”http://www.w3.org/2001/XMLSchema”
xmlns:d=”http://schemas.microsoft.com/sharepoint/dsp”
xmlns:cmswrt=”http://schemas.microsoft.com/WebParts/v3/Publishing/runtime”
xmlns:xsl=”http://www.w3.org/1999/XSL/Transform” xmlns:msxsl=”urn:schemas-microsoft-com:xslt”>
<xsl:output method=”html”/>
<xsl:param name=”ItemsHaveStreams”>
<xsl:value-of select=”‘False’” />
</xsl:param>
<xsl:param name=”FeedTitle” />
<xsl:param name=”WPPropertyBinding-Title” />
<xsl:variable name=”OnClickTargetAttribute” select=”string(‘javascript:this.target=&quot;_blank&quot;’)” />
<xsl:variable name=”ImageWidth” />
<xsl:variable name=”ImageHeight” />
<xsl:template name=”HRDocs” match=”Row[@Style=HRDocs]” mode=”itemstyle”>
<xsl:variable name=”SafeLinkUrl”>
<xsl:call-template name=”OuterTemplate.GetSafeLink”>
<xsl:with-param name=”UrlColumnName” select=”‘LinkUrl’”/>
</xsl:call-template>
</xsl:variable>
<xsl:variable name=”SafeImageUrl”>
<xsl:call-template name=”OuterTemplate.GetSafeStaticUrl”>
<xsl:with-param name=”UrlColumnName” select=”‘ImageUrl’”/>
</xsl:call-template>
</xsl:variable>
<xsl:variable name=”DisplayTitle”>
<xsl:call-template name=”OuterTemplate.GetTitle”>
<xsl:with-param name=”Title” select=”@Title”/>
<xsl:with-param name=”UrlColumnName” select=”‘LinkUrl’”/>
</xsl:call-template>
</xsl:variable>
<xsl:variable name=”LinkedInSafeImageUrl”>
<xsl:call-template name=”OuterTemplate.GetSafeLink”>
<xsl:with-param name=”UrlColumnName” select=”‘Linkedin’”/>
</xsl:call-template>
</xsl:variable>
<div>
<div>
<xsl:call-template name=”OuterTemplate.CallPresenceStatusIconTemplate”/> 
<div> 
<xsl:value-of select=”@documentname” />
</div>
<div>
<xsl:value-of select=”@docDescription” />
</div>
</div> </div> </xsl:template>
</xsl:stylesheet>
Things to take care while creating new template is to keep the same name for name and @style attributes( as below )
<xsl:template name=”HRDocs” match=”Row[@Style=HRDocs]“
and also add the <xsl:output method=”html”/> line  as added in above code to avoid the UI misalignement if any custom html is rendering null value.
3. Now upload this CustomItemStyle.xsl to same location ( Style Library –> XSL Style Sheets )
4. Now let’s make our CQWP to refer CustomItemStyle.xsl , open any page and add the CQWP and export the web part file which contains all the property tags , search for ItemXslLink
Which currently looks as
<property name=”ItemXslLink” type=”string”/>
Replace the above line with below
<property name=”ItemXslLink” type=”string”>/werkenbij/Style Library/XSL Style Sheets/CustomItemStyle.xsl</property>
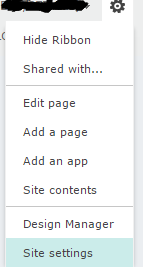
Save the .webpart file as CustomCQWP.webpart and upload it to web part gallery [ Site Actions à Site Settings à Web parts (in Gallery)]
5. Add the web part on page , lets edit the web part to select the CustomItemStyle.xsl
Navigate to Presentation –>  Styles –>  Item Style and select CustomItemStyle.xsl from drop down.

That’s it guys your CQWP WITH CUSTOM Item style is ready to ship :)

Friday, January 23, 2015

How to hide menu item in SharePoint 2013 ?

Lets take up the scenario to hide menu item TestLink which comes up on all the pages across the site under About us Menu section (as shown below)


steps 1:


Open your site and navigate to site settings as show in below screen shot


2. Click on Navigation link from Look and feel section


3. Scroll down on Navigation settings page till global navigation setting as shown below , select the TestLink which needs to be hided and click on Edit from top menu


4. a new pop up window called as Navigation Link is opened ( as shown below )  , at the end on Navigation link please add the group which can see the Link . here i had added viewers group so users belonging to viewers group can see this 


5. Click on Ok button on Navigation Link page and also on Navigation Settings page .
6. Now Navigate to Home page and test Menu item link using user account other than viewers group it should show as below.


Friday, January 16, 2015

Increase upload file size in SharePoint 2013

Hi All , this blog will talk about how to increase default upload file size for SharePoint Web Application using central admin configuration, this is one of the common issue while uploading video or any other large files to Sharepoint. 


Steps 1: Navigate to central admin and open “Manage web applications” link


Step 2: once web application management page is opened, select
https://downstream.petronas.com and click on general setting from ribbon button
As shown below


Step 3: Once general settings pop up window is opened, scrow down to Maximum upload size section and change the default 250 MB to 500 MB, scroll down to save the change by clicking on ok button.

The default maximum file size is 250 MB . This is a configurable up to 2 GB(2,0470 MB).


 Thanks !!

Wednesday, December 31, 2014

C# code for Hashing String with SHA256


In this blog I will walk you through how to hash string using SHA256 HashAlgorithm, below is the detail code with inline comments,
   
                    //string which needs to be hashed with SHA256 algorithm             
            string Concatenatedstring = “StringToBeHashed”
                       
                     //Variable declared to store hashed string
            string stringhash = string.Empty;

             //SHA256Managed class instantiated

     SHA256Managed sha256managed = new SHA256Managed();

      // Convert string to bytes

            byte[] utf8 = Encoding.UTF8.GetBytes(concatenatedstring);

             // compute hash value from bytes
            var HashValue = sha256managed.ComputeHash(utf8);

             // get string value
            foreach (byte b in HashValue)
            {
                stringhash += b.ToString("X2");
            }


Saturday, December 13, 2014

Get Current User name using JQuery in sharepoint 2013

Here is the code to fetch current user name ( logged in user name ) using Jquery , this can be user on content editor webpart or list form .

things to take care before u use below code
1. download jquery-1.4.2.min.js and jquery.SPServices-0.5.7.min.js and
2. upload both the downloaded files to style library under new folder named as js.


<script language="javascript" src="../../Style Library//js/jquery-1.4.2.min.js" type="text/javascript"></script>  
<script language="javascript" src="../../Style Library/js/jquery.SPServices-0.5.7.min.js" type="text/javascript"></script>
<script type="text/javascript">
 
//to make sure above added script links are loaded on page
  $(document).ready(function() {
 
// to get formlabel control
  if (document.getElementById("formlabel") != null)
{

document.getElementById("formlabel").innerText =  $().SPServices.SPGetCurrentUser(
{fieldName:"Title",
debug:false
});
}
</script>

formlabel is html label , innertext of label is set to current logged in user name programmatically using above code.

Sunday, December 7, 2014

Programmatically Download sharepoint file


      Here I wil talk about how to download sharepoint file (image/Document/Video) on button click, SharePoint provides you inbuilt solution using STSNavigate function which helps to navigate to system page download.aspx and download.aspx contains code to download file


1. If using server side code


downloadButton.OnClientClick = "STSNavigate('" + SPContext.Current.Web.Url + "/_layouts/15/download.aspx?SourceUrl=" + fileURL + "' ); return false;";


In above line of code STSNavigate will do magic of giving user save as option of specified file URL, also here we are using system page download.aspx


2. If using client object model

if below code the only thing you need to do is to form fileURL.
$(‘#<%=btnDownload.ClientID%>’).click(function (e) {
STSNavigate(‘<%= SPContext.Current.Web.Url %>/_layouts/15/download.aspx?SourceUrl=’ + fileURL);
return false;
})